Fabric transfer paper gift ideas

These 5 fabric transfer paper gift ideas were inspired by some great tutorials over at Wolves in London, Sabrina’s blog is a great resource and so I have to start this post by thanking her for introducing me to a great new craft addition! If you’re of the crafty ilk I urge you to check out her tutorials

I have been beavering away with making gifts for a while now, part of my moneysaving plan for birthdays and ahead of this Christmas I have been trying to make as many cards, gifts and wrapping as possible. I sort of hit on a slow period this Summer and decided to look around. When I saw Sabrina’s lovely fabric transfer projects I had to have a go and made a list of fabric transfer paper gift ideas. As I was going for a low cost base I picked up transfer paper in Poundland. Two sheets for a quid made all of these projects plus I have made a further ten tags, five mini cards and countless fabric drawstring bags! Essentially I pasted all the images I wanted to print into a Word document and adjusted the sizes til they fitted on two pages, then I printed them and cut out the images ironing them onto my projects as and when needed.

I sourced my images from a range of places, including by searching for ‘free vintage printables’ on Pinterest.

Here’s my rundown of 5 fabric transfer paper gift ideas

Five fabric transfer paper gift ideas

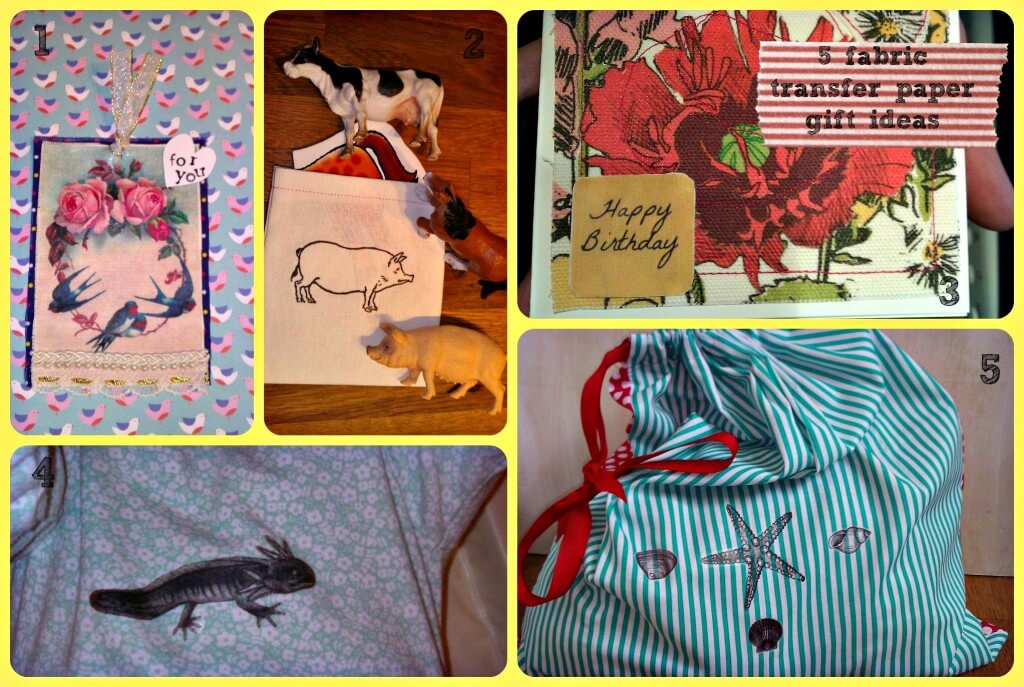
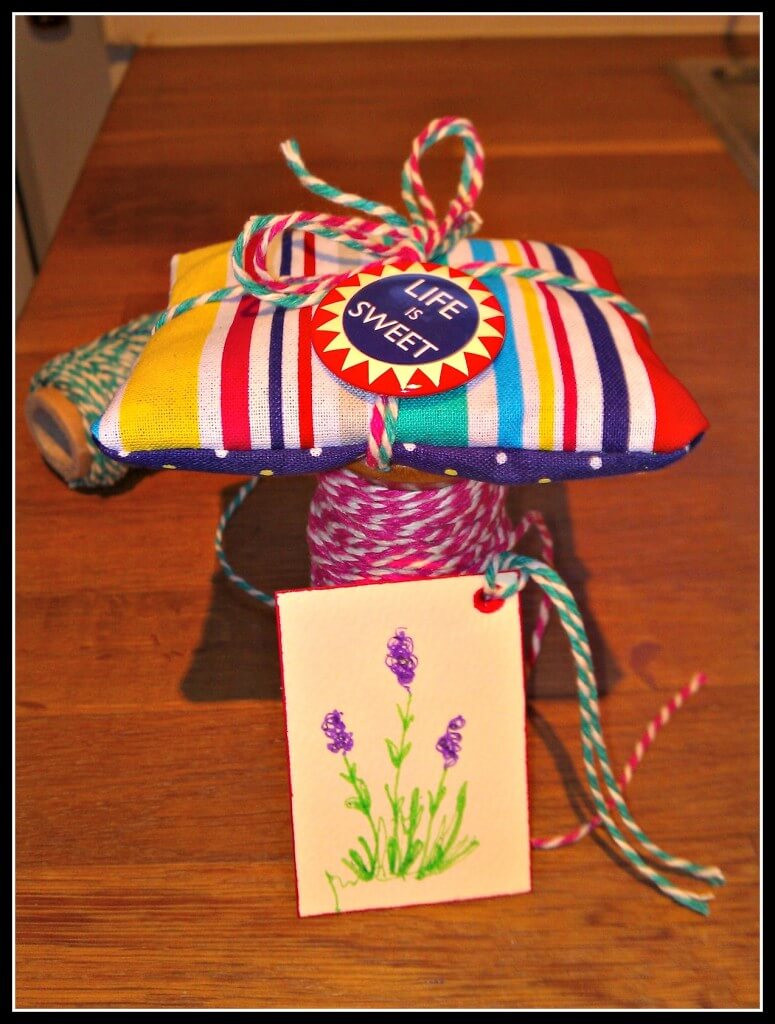
1 – Vintage sweetheart print gift tag with lace and pearl embellishment

Ironed onto some plain calico and then cut out and layered onto fabric this sweet tag was then embellished with a piece of lace from my stash and some pearl braid which I use for so many projects but picked up from my local fabric store for a bargain 5p a metre in their fantastic sale. I have since made oodles of these little tags, they make simple presents look really special!

2 – Children’s party favours or travel storage bags

I made this little calico bag in about ten minutes to store Joss’ farm puzzle pieces which kept getting lost. She loves this simple pig print and I think it would look great on a tea towel too! These would make cute party bags filled with sweeties or a little colouring book and crayons

3 – Fabric cards

This does what it says on the tin, I have loads of fabric samples and often stitch them freehand onto card but don’t always have complementary Happy Birthday stickers, instead I typed and printed up some Happy Birthday motifs to add to my cards!

4 - An Axolotl’y Fabulous Tee

Joss’ favourite word is axolotl, for those not in the know an axolotl is a ‘walking fish’ and there is one at our local museum. Joss loves them, she also loves printed tees but the chances of me ever finding an axolotl tee were pretty slim, now she has one! I know this won’t be for everyone but it’s made a Mama and her Girl very happy!

5 – Fabric drawstring storage bags for shoes, undies, you name it!

These become an altogether nicer gift for the addition of a little ironed on motif, this beachcomber print is perfect for my seaside loving girl and stores her precious cuddly toys, I made myself one with a print of a pair of special shoes and another to give as a gift with the recipient’s name printed on.

I hope you like these fabric transfer paper gift ideas, if you have a go yourself do let me know what you make!

Upcycling From Adult to Toddler Apron

Joss loves to help out in the kitchen and I looked for a little apron but didn’t like all the plastic ones we saw. Eventually I spotted an adult apron in Poundland and liked the sweet ditsy flowers so this was a cut and stitch job waiting to happen! Upcycling From adult to toddler size is easy, if you want to do the same just chop off the bottom and either use to make a pocket or save for a hairband or other project.

Then chop the sides saving the ties (I used a dress of hers for basic measurements for length and width) then I cut off the neck tie and repositioned a couple of inches closer together and stitched up all the hems finally repositioning the waist ties after she tried it on to give a comfy fit.

Cute and thrifty in less than an hour!
fabric toddler apron

Button Craft Tutorial Mumslist

Real Life

This week has been more relaxed but relaxing myself if something I find hard so I took to crafting again as I like to have busy hands to keep a busy mind calm! We’ve also been potty training but more on that later!

index

You can make this little button heart in less than half an hour with some fine craft wire and an assortment of buttons. Just thread your buttons onto the wire one after the other gently bending the wire to get the buttons to sit close to each other, then when you have a long line of say eighteen buttons bend the ends of the wire together to form a circle, then bend into a heart shape and keep moulding the wires til you’re happy with it. add a ribbon and admire your handiwork. This works really well with little crystal buttons or a mix of crystal and silver too!

heart

Blog Life

This week I have been joining in with some comment linky groups and have come across some lovely new (to me) blogs in doing so. I have also been working on my photography, still not great but I thought I’d share some of the things I’ve been trying here with my five photo tips for fellow non artistic bloggers!

Inspiration

I came across Keri-Ann’s blog through a blog comment linky Gingerlillytea is pure whimsy and gorgeousness you must stop by with a cuppa and have a good old read!

I am also hugely inspired by this pin and am looking at creating something similar in our little space!

c97e802db6ddd6a0e54116cabc3de6d1

- See more at: http://www.mumsdays.com/#sthash.afvKx888.dpuf
 

Deckchair Stripe Lavender bags

I made some of these little lavender bags as a gift for my Mam; I’d booked a massage for her birthday and wanted her to have something relaxing to unwrap as I don’t like giving a gift token as a gift with nothing else, must be related to my wrapping paper obsession!

These are really easy to make up, if you have your own lavender plant as I do harvest the heads as they are drying at the end of their season, bundle and hang them together and then when they’re dry take the husks and store them in a dry place until you’re ready to use them. Stitch together two scraps of complementary fabrics insides facing, I liked a summery deckchair stripe, leaving a small gap to turn the right way round through, then fill with lavender and hand stitch the gap closed.

index1

So satisfying seeing something from your own garden brought back to life!

index

DIY body scrub…very very bright pink!

I adapted a Martha tutorial to make this bright pink scrub today, all for under £3 (I had some ingredients at home but still waaaay cheaper than a shop bought spa version!)

Image

I used two cups of epsom salt, 100ml of almond oil, five drops of lavender and chamomile blended oil and mix mix mixed with a small amount of natural red food colouring to give the satisfyingly pink colour. These photos are taken half way through, once topped with the second cup of epsom and a little more almond oil it mellowed to a lovely rosy pink! A real softening treat on a budget!

Image

Woodland Themed Nursery Fabric Picture Tutorial

I’m finding that it’s all very well and good having this free time to relax and get involved in some crafting but there’s really not much that I ‘need’ to make at the moment, we’re stocked up with birthday cards and the likes so I decided to turn my hand to making some birthday gifts.

This little framed mixed-medium picture was thrifty and fun to make.

WP_004161

Perfect for a toddler or young child’s room I hope that its recipient will like it!

If you’d like to make one yourself I suggest checking out charity shops for a similar embroidery hoop, I think they make really sweet frames for these fabric pictures, painted or plain they look good with a ribbon to hang them!

Materials

I started with an embroidery hoop (50p in a charity shop), some twine and little buttons and a selection of fabrics from my own stash, my sewing machine, but you can do much of it by hand, and some red project paint left over from this project. I had the little squirrel iron on patch from a set from H&M that I bought to decorate some plain t-shirts for Joss, so this one cost about 40p.

OLYMPUS DIGITAL CAMERA

Base fabric

I selected this bright yellow flower print base fabric as it is pretty robust.

OLYMPUS DIGITAL CAMERA

I drew around the outside of my hoop to give a guide for cutting the excess fabric, then drew around the centre piece to mark out the workspace I will be adding embellishment to.

Theme

Then I laid out my various bits and bobs to go apply to it as I went along. I decided on bunting and flowers with the woodland squirrel as these are pretty safe toddler themes, and as I prefer brights for a little one’s room I went with blues and reds to complement the yellow.

I cut a cardboard triangle to use as a template for my bunting flags, drew around it and cut out seven flags.

OLYMPUS DIGITAL CAMERA

Getting started

I stitched the bunting flags in place

sewing

Then I cut two lengths of twine which I overlaid with a few stitches at inch intervals to hold in place
twsine

Embellishments

I made a fabric yo yo as a flower embellishment, I love yoyos, they’re very simple. There’s a great tutorial here, but basically you cut a circle of fabric and leaving a long tail of thread as you start fold and tack a quarter of an inch under on the wrong side of the fabric as you go with a needle and thread, once you reach where you started hold both ends of the thread and pull tightly to gather the fabric, then knot the ends of the thread and neaten with scissors leaving as it is or in my case adding a small red fabric heart to cover the hole where the yo yo fabric gathers in the middle.

OLYMPUS DIGITAL CAMERA

OLYMPUS DIGITAL CAMERA

I cut fabric hearts and fabric flower shapes by cutting more circles and then cutting out notches to form petals, layering where I fancied and adding button centres to add interest, I decided to glue some in place and stitch others to add to the homespun effect.

OLYMPUS DIGITAL CAMERA

OLYMPUS DIGITAL CAMERA

Finishing touches

Finally I ironed my little squirrel motif in place.

OLYMPUS DIGITAL CAMERA

Once I’d trimmed the yellow fabric back and tightened the frame using the screw fix I decided it needed a little lift

OLYMPUS DIGITAL CAMERA

I painted the frame red and as I didn’t have ribbon I crocheted a strand of single crochet to add a loop to hang up the frame (I am a great believer in using what you have to hand)!

Tada!

index

Thrifty-Thursday-Badge

Fancy a new hobby? How to get started with crafting

My craft space is coming along nicely and I was telling a friend about it this week, she said she’s always wanted to do something crafty but doesn’t know where to get started. I thought I’d blog about how I fit crafty activities into my daily life, something I managed to do with a newborn, whilst studying and now whilst working and parenting, as it’s important to me to do something that I find relaxing, productive, fun and that brings some colour into my life!

1) Start with a small project

You can dip into a small project over short periods of time, nap times are great for small projects as you are also closer to a sense of satisfaction at having finished something! This felt baby mobile was the first thing I made after I had Joss, it gave me a small sense of purpose during nap times when I didn’t want to sleep and occupied my mind which I sometimes needed when I was feeling anxious as a new mother

OLYMPUS DIGITAL CAMERA

2) Wrap it up

Package up your project in a zip lock bag so you can quickly pop back to it, I sometimes have a couple of bags on the go and take one to work to spend time on over my lunch breaks

Photo_B9235F40-43FC-C46D-03B7-498D57B09332

3) Re-use and save

Try to use what you have at your disposal, you don’t need to spend as lot to find a cathartic hobby! Take these greetings cards I blogged about last week, made from recycled wrapping paper I didn’t need a lot to make something special

OLYMPUS DIGITAL CAMERA

4) Take to a book

Look at craft literature, magazines are great, they often come with a project inside, like this month’s Homemaker. I made this cushion using materials that came with the magazine, Joss loves it, I got loads of inspiration from the book and learned a new skill, soft toy making! Better still, visit your local library, many have a craft section and with a photocopier on site to copy and enlarge any patterns you may find a gem!

Photo_F30B6DD0-873E-1271-4C63-AF31E72D1170 Photo_D24C170F-F7C3-87AA-8898-921B89F8E59F

5) Try to make a little time every day

You’d be surprised how a small project works up pretty quickly with even just ten to fifteen minutes a day, and by how relaxing picking up a project can be! This is a longer term work in progress of mine, the crochet blanket in the background, so far I’ve put about three hours in over many days, it’s so colourful it’s a joy to return to after a busy afternoon with Joss!

935143_10151822088052062_2122843051_n

What craft would you like to try and why? Or if you’re yet to dip your toe in the water what’s stopping you?

Crafting time – canvas quad for less than £10

Crafting time - canvas quad for less than £10

I finished Joss’ 4 canvases today, all with a seaside theme and incorporating photos from her first trip to the coast at South Shields and her first dip in the sea.

Bargain canvases at £4 for 4 and a craft magazine with all the trimmings made this a really cheap and easy activity, kept me busy for a few nights and will make a pretty display in Joss’ room!

OLYMPUS DIGITAL CAMERA OLYMPUS DIGITAL CAMERA