The Weekend Box Club and Try It Free code!

Fancy something crafty for the weekend? We’ve been reviewing The Weekend Box club this week!

The lowdown on the Weekend Box Club

collage

In November (2014) Weekend Box won ‘Start-Up of the Year’ at the Start-Up Loan Competition in London, the Weekend Box activity packs are designed to fit through your letter box fortnightly and contain four activities to keep little ones aged 3 – 8 busy over the weekend.

1970479_723301621055477_162958948_n

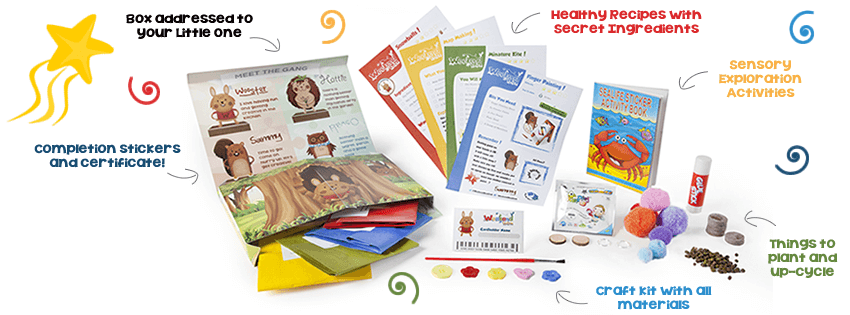
Each box has something foodie, something to upcycle, something to make and something sensory too. Sectioned into handy activity packs with a ‘how to card’ and stickers and certificate on completion the pack is so handy for getting some quick and engaging play off the ground!

collage2

I love that the packs are designed to encourage discussion of healthy eating, recycling/green living and something sensory too, it’s a really well rounded selection!

Each box has:
Something to Cook
Something to Make
Something to Explore
and Something Green

The Theme

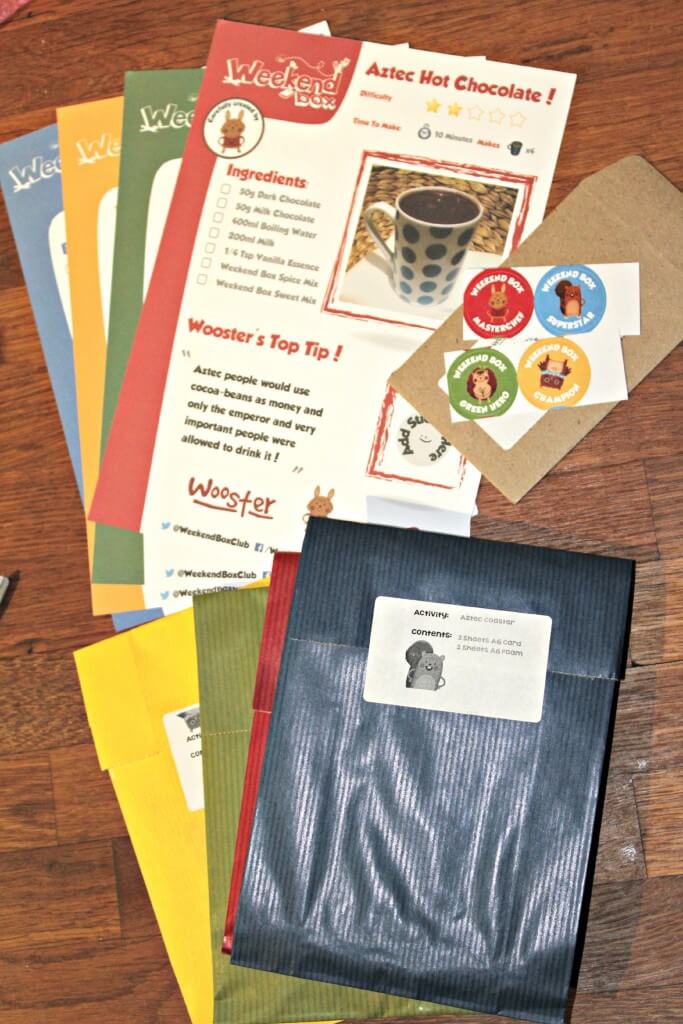
The theme of our box was The Aztecs, although Joss is still a little too young to get the deal behind the theme we looked at some cool Aztec prints online in preparation for getting started! When the box arrived I was really impressed with the thought put into the design, how exciting for little ones to receive their own post in a beautifully printed box full of things to make and do.

The Activities

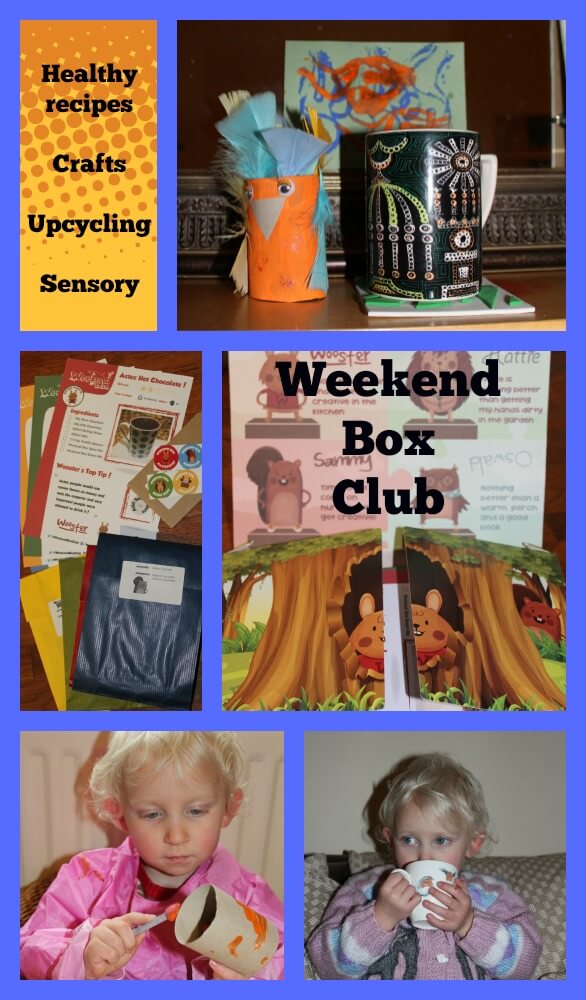
We had a whale of a time with our four activities. We made hot chocolate together and this was a bit of a special moment as J had her first ever hot chocolate and boy did that go down well! We talked about how it was a treat and the spice mix included in the pack smelled so good that it was a sensory activity in itself!

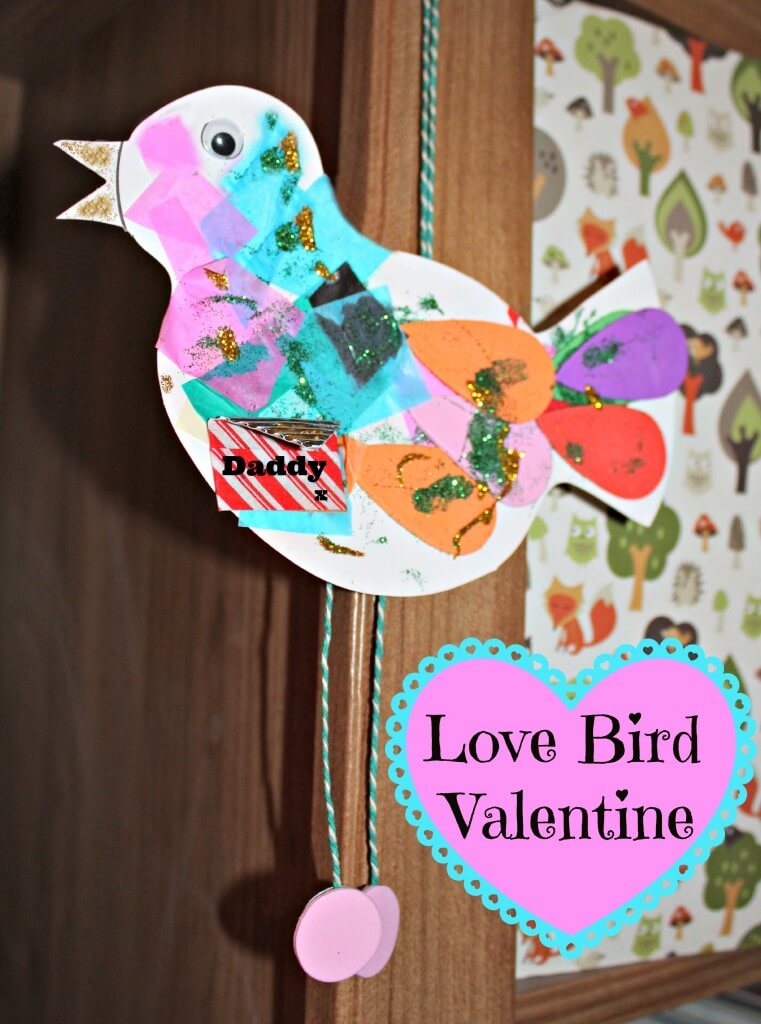
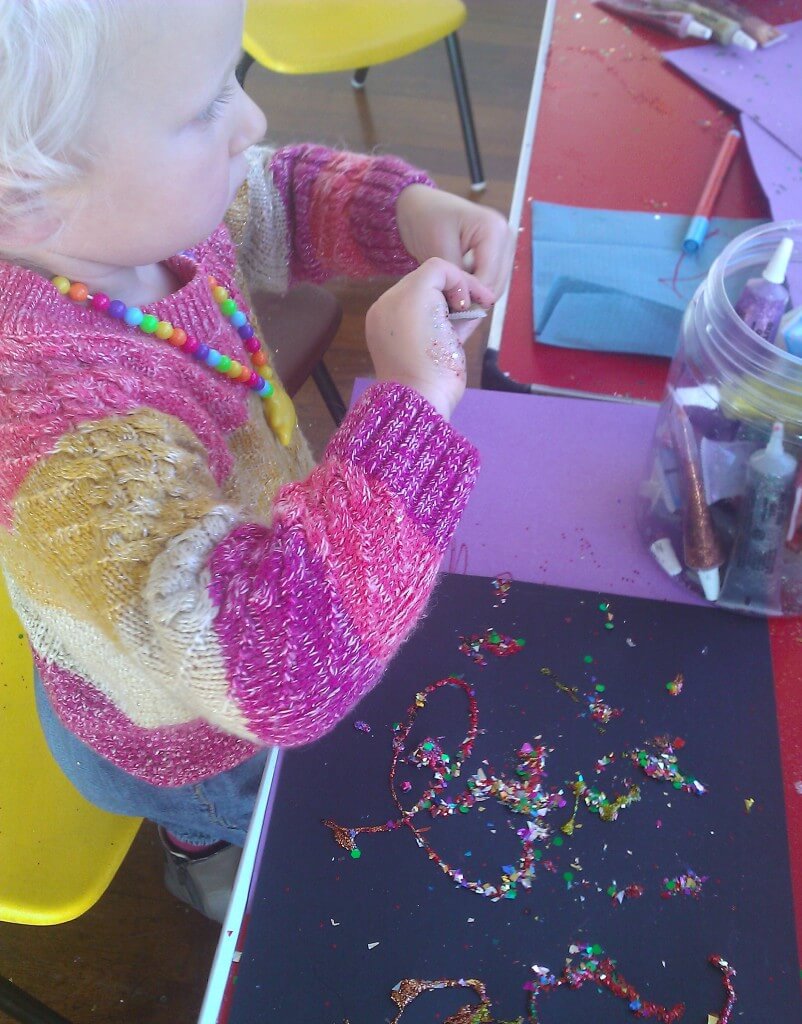
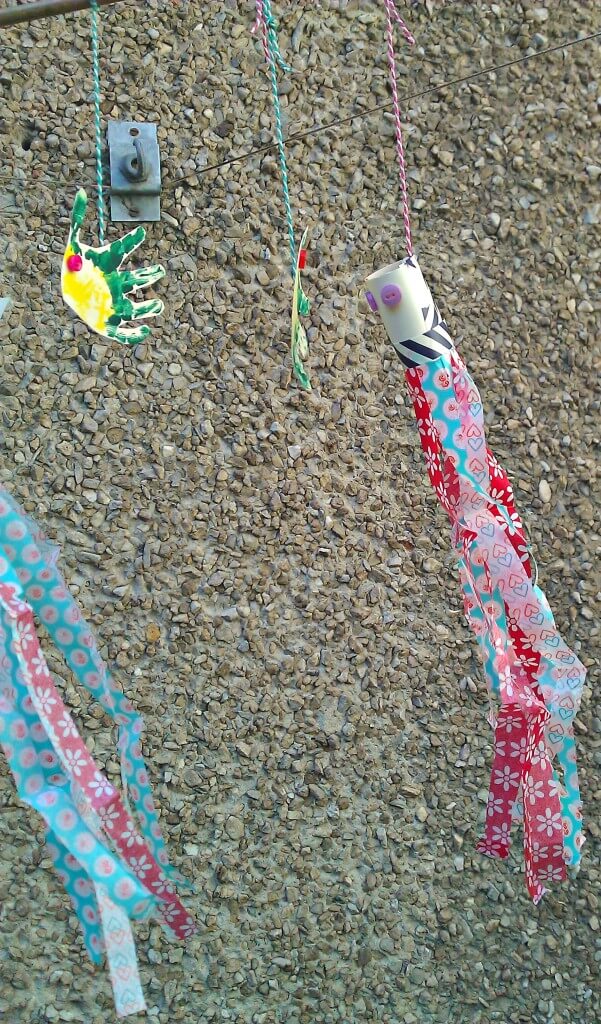
The crafty bits were brilliant, we loved making an Aztec parrot and as J has just learned to get to grips with little scissors making a coaster from foam was fun and resulted in a sweet little gift for daddy to take to work too! Although not the mosaic design that the pack suggested this demonstrates that the materials included can let kids do their own thing too! Finally we both enjoyed making the Aztec prints from string and this is something we’ll definitely do again to make wrapping paper on a larger scale!

What we think

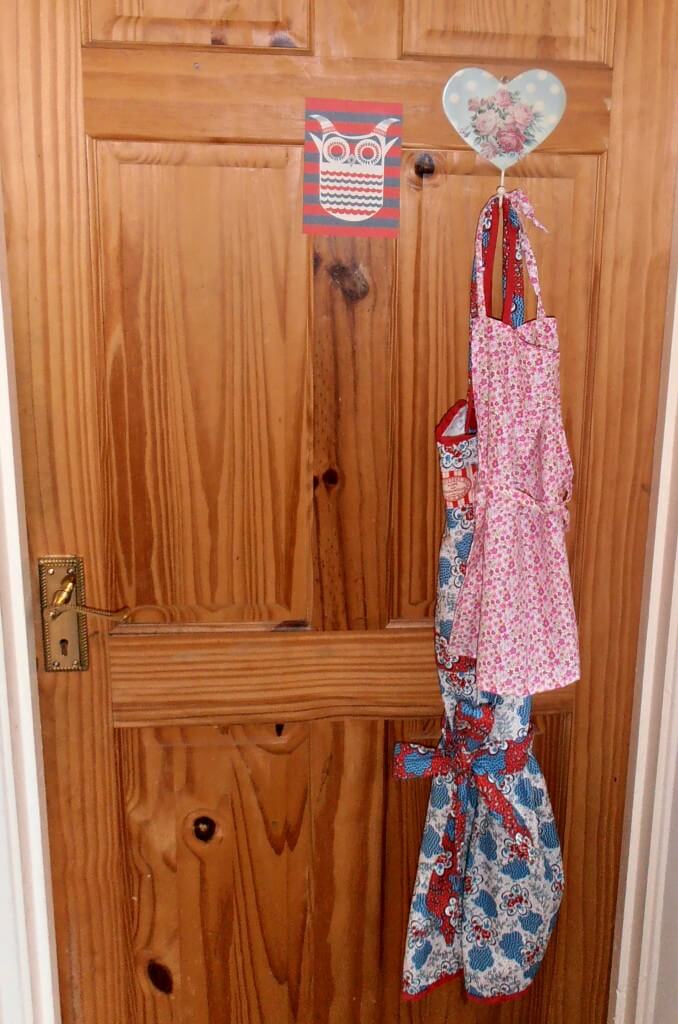
I think this is a brilliant idea and perfect for a rainy weekend or to dip into on a slower day, I’ve just recommended it to a friend who is stuck at home with a tot with chicken pox too! The age range, 3 -8 shouldn’t put anyone with a younger toddler or older one off as the activities are really engaging at both ends of the spectrum (my little lady is almost 3). J and I were delighted with the contents, I loved the powder paint, ingenious stuff, and the resulting makes are brilliant and now taking pride of place in our craft gallery!

Try it for Free!

The lovely people at the Weekend Box Club have given me a promo code for you guys to get your first Weekend Box for free. Boxes can be redeemed from www.weekendboxclub.com with the code ANG236 (new customers only please and just one free box is allowed per household) – I’d love you to share your makes with us!

Chinese New Year Toddler Paper Fish Kite

chinese new year toddler kite

Newcastle’s Chinatown lies in the historic heart of Newcastle in Grainger Town and we use the Chinese supermarket down there a couple of times a month. I’ve always loved Chinese New Year, the street parade and fire crackers, and last year J visited with her Daddy and loved it too, coming home with fortune cookies and a paper dragon and a big smile on her face.

This year we’ve made some lanterns but I’ve seen lots of tutorials about those, we decided to make a paper kite this week and I’ve shared some step by step instructions below, with lots of room for artistic license. For J this activity was about a new skill, paper scrunching and sticking, so she made the scrunched paper cuff whilst I assembled the main body of the fish.

chinese new year toddler kite 2

Chinese New Year Toddler Paper Fish Kite – step by step

You need:

An empty toilet roll

Three sheets of tissue paper in different colours

Plain white paper

Glue

String/thread

Scissors

How to (tots)

Set them away with a sheet of paper and scraps of tissue paper and show them how to scrunch and stick the tissue down to make a cuff to decorate the fish. Adding glitter is always popular with toddlers! When finished attach the cuff to the fish with tape

How to (grown ups/older children):

Take a large sheet of tissue paper and place the toilet roll inner at the top left of the sheet, then roll the inner to cover it in tissue paper, secure with glue or tape, this forms the mouth of the fish, at the other end make a tail by cutting a deep v.

Decorate the body of the fish by wrapping with strips of different coloured tissue paper and tape/glue in place.

Cut fins from tissue and attach them to your fish

Cut and attach circle shapes for the eyes

Cut long strips of tissue to form the tail pieces and attach inside the tail with glue

Finish by carefully punching two holes in the top of the fish (in the toilet roll inner) to attach a string to ‘fly’ your kite!


Love Bird Valentine

Valentine’s Day is something I’ve always liked, not in a cheesy way, I just have fond memories of my mam buying a special cake or treat for supper on Valentine’s Day and it’s a tradition I’ve always kept to, sometimes baking something for the loves in my life, sometimes just grabbing a treat from the shops after a busy day.
Joss and I have made a Valentine for Daddy this year, sadly she was too excited to keep it a secret but I’ve squirreled it away and I’m sure he’ll have forgotten in a month’s time!

If you’d like to make your own love bird it’s really easy.

Love Bird Valentine

I drew a rough bird shape on white card and cut it out for Joss to decorate.
Once she’d had free reign with the glue, glitter, foam stickers and strips I’d cut from leftover tissue paper wrapping we popped it to one side to dry. This took a long time, Joss LOVES PVA glue!

I took some twine and cut three lengths, one for the hanger which is taped in a loop with washi tape to the back of the bird, and two for the legs, adding a foam shape for feet and again attaching to the back of the decoration.

Finally I cut a rough envelope shape from stiff card to carry the love bird’s valentine message, ‘Daddy x’ and glued this to the bird’s body adding the finishing touch, a googly eye and ta-da, Happy Valentine’s Day Daddy!

valentine

Egg Carton Christmas Trees

egg carton christmas trees

Joss and I have been getting crafty most evenings for the last week. After dinner we clear the table and she asks to draw, once she tires of another round of drawing pigs and slugs (it’s always pigs and slugs she draws, I don’t know why!) she usually asks if we can do some painting.

I thought we’d use this time to start to make a few little Christmas decorations together. As I was clearing the kitchen last night I was about to pop the egg carton into the bin when I thought about using it for painting instead. Cutting out the centres of the carton I made some of them taller and some shorter and trimmed any rough edges before letting Joss go crazy on them with the glitter and paint!

Make your own Egg Carton Christmas Trees

If you’d like to make your own egg carton trees here’s the lowdown:

egg carton christmas tree

  • Cut out the pointed centres of your carton, remove any rough edges and prep them for your toddler by cutting them into different sizes.
  • Get decorating with paints, glitter glue and stickers
  • You can either keep them as they are or stack a shorter tree on a taller one as we have done to make them look more ‘tree like’
  • Then either keep as a snowy scene as we’ve done, or pop a little hole in the top with a pencil and add ribbon to make them into ornaments for your Christmas tree.
  • Enjoy!

A Simple Toddler Firework Activity!

simple toddler firework activity

It’s that time of year again, the time when Sarah and Duck’s firework dance is once again carefully choreographed by my tot and we all get the sparklers out!

We’ve had such fun at Joss’ toddler group this morning that I had to share her firework pictures; these are so simple and effective.

Take some black card, oodles of glitter glue and sparkles and let your little one go wild!

A Simple Toddler Firework Activity

You will need:

Black card

Glitter pens

Or glue and glitter

simple toddler fireworks

Let your tot go wild with the glue and glitter, there’s no exact science to fireworks so don’t intervene, just allow them to crack on and get messy!

WP_007133

Once they’ve made the firework designs write their name in glitter glue, then while it’s all still wet sandwich a piece of paper over the top of their picture and rub down hard to spread the glitter and the glue out and help it to hold.

Then peel off the top sheet to leave the sparkly design in place, allow to dry, then display!

Milk Bottle Elephant

milk bottle elephants

Need an idea for a rainy afternoon with a toddler now the weather is on the turn? We’re finding the nights drawing in a little tough as we sometimes miss our evening walk and like to have an activity to do instead.

We’ve become a little bored of play doh, drawing and the usual cut and stick and decided to try something a bit different one night this weekend.

Why not join us and raid your own recycling – reuse those empty milk bottles big and small to make a little family of elephants together? Cue terrible pun:

milk bottle elephants 1

I saw this idea on Pinterest for Elmer elephants but Joss is too little to consistently stick on little squares of paper without getting frustrated about sticky fingers. Does anyone else’s little one really love glue but hate it at the same time? So instead we got to work with some stickers, washi tape and googly eyes for an afternoon of crafty fun. I used some decoupage materials and set about making a little Nelly of my own whilst Joss stuck on her buttons and tissue paper!

Instructions for making your milk bottle elephant

If you’d like to make your own milk bottle elephant then grab some milk bottles and lets get started!

YOU’LL NEED:
– Milk bottles
– Scissors
– Glue
– Tissue paper
– Or stickers
– Washi tape
– Pom poms
– Googly eyes

Simply follow these steps to start your own elephant family, use big and small bottles if you have them and just take care to cut any rough edges to smooth them before your little ones get stuck in too.

milk bottle elephant

Toddler Printable Library in a Box!

If like me you have a child that absolutely adores libraries, stickers, stamps and books then I have the perfect Toddler Printable Library in a box for you!

Joss loves our local library and asks to help stamp the books when we pop in on a Saturday, I wanted to recreate this as a play activity we could do during her quiet time at home. She’s really into role play so this will make a nice change from playing ‘shops’ for a while!

I made Joss a little Library Box with bookplates, a date stamp, library cards and stickers and other stamps so that she can play ‘librarian’ at home, and now you can too!

OLYMPUS DIGITAL CAMERA

These Toddler Printable Library cards and labels are free for you to download and print as many times as you like! Just paste the label onto a shoebox, cut out the cards and bookplates and fill your box with stamps, ink, pens, stickers and hey presto, your little one is a Librarian!

Library label

library cards Printable cards

I’d love to see what you add to your own library boxes, if you print them pop back and let me know how your library play goes!


Getting crafty with The Creation Station!

This is the first in a series of posts about getting crafty with your kids, and where better to start than getting crafty with The Creation Station’s founder Sarah Cressall!

As well as running a growing business Sarah is mum of three boys and so I’m very grateful to her for taking time out of her busy schedule to be interviewed about crafting with children; her passion for nurturing creativity and design shines through!

Sarah Cressall and family

Sarah Cressall and family

Offering children’s arts and craft classes and parties The Creation Station is all about encouraging children to have a go and to try out their own ideas encouraging sensory play, experimenting and interacting with others through art. With franchises nationwide there’s sure to be a class near you!

I asked Sarah five burning questions about craft with kids and here’s what she had to say:

1) Do you have any advice to offer mums and dads or carers who feel they’re not very creative in getting started with craft with their children?

It can feel overwhelming to know where to start. The best advice is really to just see creativity as a journey of learning. It’s really helpful to see creativity as just exploring and experimenting rather than focussing on a specific end product. That helps take pressure of trying to teach, and turn it more into enabling a fun opportunity to learn together though play. With some newspaper and old clothes and some creative materials it’s amazing to see what happens. A relaxed atmosphere really helps the ideas, creativity and giggles to flow.

2) What are your favourite ideas for summer themed craft activities?

Ooo! I’ve loads! I love children being able to enjoy doing creative stuff together. I love having friends round and letting the children get out all the painting tools and buckets of water and water painting the garden!

Chalk drawing on the patio is fun especially if they make a draughts board or hop skotch, or drawing a target to throw balls into.

As my boys have got bigger origami water bombs have gone down really well. Also letting the children paint each other faces – and the grown ups is great fun. Important to remember to wash your face if your popping out to the shop though! Really it’s about finding creative play opportunities that they can really get involved in and have fun. The magical thing about creative fun is it inspires all ages. We find our family fun sessions work really well for families who maybe have a 2yr old a 5 yr old and a 8 yr old cousin who’s visiting. Everyone does it in their own way – and that’s how true creativity is nurtured and developed.

Brilliant butterflies from Creation Station

Brilliant butterflies from Creation Station

3) I get really excited about all the possibilities for crafting with my daughter but sometimes feel she’s a little too young for them, what would you say is the best way to introduce babies and toddlers to craft and messy play that’s age appropriate?

What’s lovely is your passion and enthusiasm will come across – and that’s a wonderful way to play with babies, toddler and children of any age! The sensory development through hands on creative play is a wonderful way for babies and toddlers to learn about their world. So some ideas are to introduce a range of safe materials and textures. It’s helpful not to have any expectations of making things. Just sharing, talking about and exploring the different shapes, sounds, textures, colours, smells is a wonderful fun, bonding experience that you can both enjoy and grow through.

Fun for all ages with The Creation Station

Fun for all ages with The Creation Station

4) Many of my readers have children of different ages and at different stages, are there ways to involve children of different ages in the same activities?

That’s such a great question and one that many families naturally have to deal with. Our approach to nurturing creativity is a bit different to others. Instead of starting with the end in mind we encourage a journey of thinking. One of the magical aspects of arts and crafts is that every person can use materials in a way that inspires them. So a 2 year old could create with card board boxes and paper and glue in a completely different way to an 8 year old, and they both feel really proud of their creations.

5) And finally do you do any ‘grown up’ crafting in your spare time, and if so what do you like to do?

I love design and the arts and still love making things myself. As a family we are trying to build an outdoor cinema in the garden- well, the plan is a deck and roof and a projecter. We’ve had great fun knocking down the old shed, sawing and building the deck and roof and painting it. As far as smaller projects go I’m often inspired by what I see within our franchise network. We’ve been working on our favourite top tips and and ideas and are now writing them up and sharing them through our soon to launch Creative Sparks site (Ed.- sounds exciting, watch this space!)

Huge thanks to Sarah for sharing her crafting insights, she gave me real food for thought about a journey of thinking that I would extend into other areas of my parenting and our play and learning together.

I’d love to here from readers about the activities they try out with their little ones – what activities does your family enjoy?

Disclaimer: I interviewed Sarah to gain ideas for my readers, this is not a sponsored post but a post for the love of craft! All photos were supplied by The Creation Station

Toddler Octopus Craft and Fuschia Flowers in an Octopus’ Garden

Joss and I took out crafting outdoors with a playdate this week, she and a friend made handprints which we cut out and made into fish with buttons for eyes, with some tissue paper and card (and washi tape, standard) we made an octopus for each of them.

under the sea toddler craft

While they were busy with toddler octopus craft I snapped a few of my yarden favourites, vibrant fuschias.

fuschia flowers fuschia flowers

toddler octopus

Upcycling From Adult to Toddler Apron

Joss loves to help out in the kitchen and I looked for a little apron but didn’t like all the plastic ones we saw. Eventually I spotted an adult apron in Poundland and liked the sweet ditsy flowers so this was a cut and stitch job waiting to happen! Upcycling From adult to toddler size is easy, if you want to do the same just chop off the bottom and either use to make a pocket or save for a hairband or other project.

Then chop the sides saving the ties (I used a dress of hers for basic measurements for length and width) then I cut off the neck tie and repositioned a couple of inches closer together and stitched up all the hems finally repositioning the waist ties after she tried it on to give a comfy fit.

Cute and thrifty in less than an hour!
fabric toddler apron