Crafter’s Companion Easter Wreath Make

The challenge

The lovely folks at Crafter’s Companion set me a little Easter challenge, to make an Easter wreath using some goodies they sent me in the post. I love a craft challenge, and haven’t done anything creative for a few weeks so I took up the mantle, and here are the results!
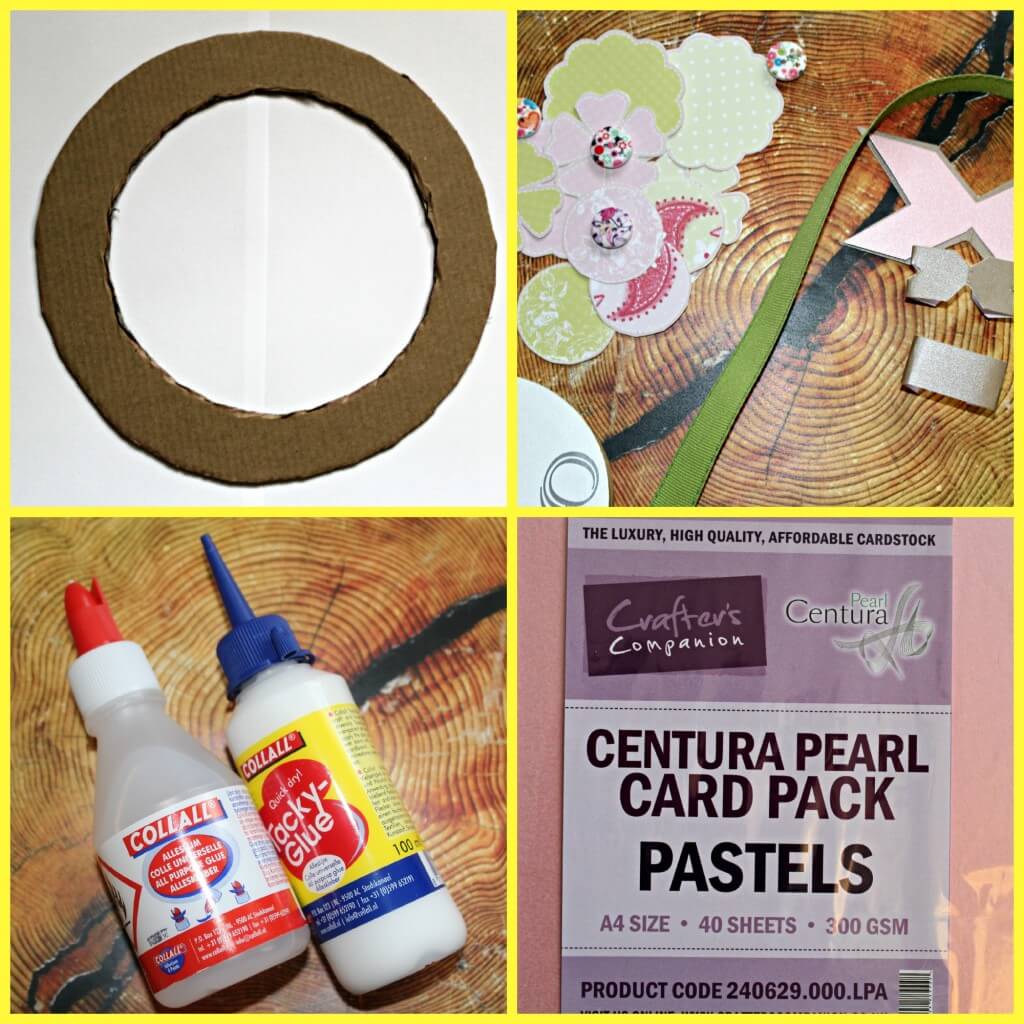
IMG_4497

Supplies

  • A cut out cardboard ring (I made my own by drawing around two different sized plates and cutting out carefully with scissors
  • Two different coloured ribbons (I used a spring green and cream)
  • Collal tacky glue and Collal all purpose glue
  • Crafter’s Companion Centura pearl card pack
  • Patterned paper flowers
  • Buttons

index

Easter Wreath Make: How to

  1. Secure your ribbon to the back of the wreath with a little all purpose glue, then wind the ribbon around until you’ve covered just more than half of the wreath. Switch to your second colour ribbon until the wreath is completely ribbon-wrapped.
  2. Add another length of ribbon using all purpose glue to make a loop to hang your wreath
  3. Cut out your flowers from patterned paper (I used a printable) and cut out some rough leaf shapes from pearl card stock. Assemble your flowers in layers with tacky glue and pop a button in the centre of some of them to add to the 3d effect, stick the leaves to the back of each flower
  4. Assemble your wreath by gluing the flowers into position slightly off to one side of the lower wreath
  5. Cut some ribbon shapes from pearl card and assemble with tacky glue. I cut a large ribbon shape, a smaller copy in a contrasting colour, then assembled a simple 3d bow by gently folding the card stock to make the ribbon ‘stand out’ – a final loop of card to cover the centres of the ribbons finished off the look – again I used tacky glue to affix to the wreath
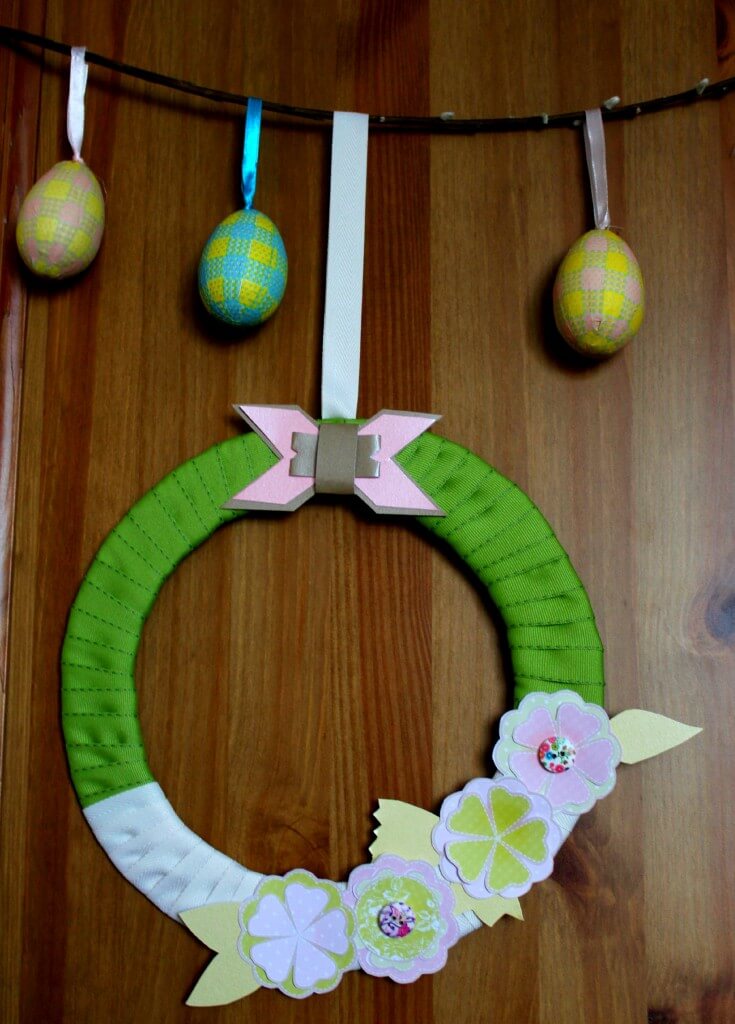
The finished piece!

I have hung my Easter wreath onto a piece of willow branch, with some contrasting coloured paper eggs to add to the festive feel! I’m really happy with the finished result – thanks Crafters Companion for providing me with the materials and the inspiration for this eggstra special make (no more Easter puns now, I promise!!)

IMG_4504 IMG_4516

Kokuyo Staple-Free Stapler

I am delighted to be a National Stationery Week blogger, as a recent student and self confessed stationery-phile I love to try new products to the market. Kokuyo ’s staple free stapler is a revolution in stapling, it has no staplers but holds papers securely, magic!

Kokuyo Staple-Free Stapler

This little beauty makes two incisions in your paper, folds them back, then ‘staples’ the paper together using a special punch action – how handy is that!

I deliver a lot of training courses and frequently staple the materials for handouts on the train, this negates the need to take lots of additional stationery with me and can staple up to four sheets of paper at a time making it perfect for those powerpoint presentations and evaluation forms! As you guys know I also love anything that reduces waste so this is a pretty eco friendly option for smaller stapling jobs too.

I was sent the Kokuyo staple free stapler in green and couldn’t wait to give it a go, as well as securing my work it made light work of attaching some paper bunting I made for a blog background and the little arrow design is pretty unobtrusive for craft projects too!

IMG_4233

I may have also had a few other bits make their way into my stash this week, Project Life cards, new washi tapes and an eBay accident in which I thought I bought a single Totoro bookmark but 52 arrived instead!

stash1

What do you think? Will you be trying the staple-less stapler?!

NSWbloglogo2

Washi tape beach huts

washi tape beach hut

This one does what it says on the tin, it’s a swift tutorial using washi tape, I know it’s winter but I’ve made a stack of these using different tapes and am going to string them onto bunting for in J’s bedroom, there’s something really jolly about stripy beach huts, whether using traditional blue and white tapes or something a bit jazzy like this one!

How to make washi tape beach huts

Make yourself a beach hut template (essentially a rectangle with a triangle on top!) and draw around it onto plain card.

Use your tapes to fill out the design, hoops work well but any design would work really! You can overlap the tape and be quite rough with it as long as you cover the hut shape.

Finish the hut by using a wide tape in a contrasting colour to make the ‘roof’

Decorate as you wish, I used wide blue tapes to make a door and windows and decorated with a sharpie, a button and some washi curtains and a gold ‘rope’ effect embellishment.

Cut out your beach hut and use as a card topper, as bunting or a jolly postcard!


Chinese New Year Toddler Paper Fish Kite

chinese new year toddler kite

Newcastle’s Chinatown lies in the historic heart of Newcastle in Grainger Town and we use the Chinese supermarket down there a couple of times a month. I’ve always loved Chinese New Year, the street parade and fire crackers, and last year J visited with her Daddy and loved it too, coming home with fortune cookies and a paper dragon and a big smile on her face.

This year we’ve made some lanterns but I’ve seen lots of tutorials about those, we decided to make a paper kite this week and I’ve shared some step by step instructions below, with lots of room for artistic license. For J this activity was about a new skill, paper scrunching and sticking, so she made the scrunched paper cuff whilst I assembled the main body of the fish.

chinese new year toddler kite 2

Chinese New Year Toddler Paper Fish Kite – step by step

You need:

An empty toilet roll

Three sheets of tissue paper in different colours

Plain white paper

Glue

String/thread

Scissors

How to (tots)

Set them away with a sheet of paper and scraps of tissue paper and show them how to scrunch and stick the tissue down to make a cuff to decorate the fish. Adding glitter is always popular with toddlers! When finished attach the cuff to the fish with tape

How to (grown ups/older children):

Take a large sheet of tissue paper and place the toilet roll inner at the top left of the sheet, then roll the inner to cover it in tissue paper, secure with glue or tape, this forms the mouth of the fish, at the other end make a tail by cutting a deep v.

Decorate the body of the fish by wrapping with strips of different coloured tissue paper and tape/glue in place.

Cut fins from tissue and attach them to your fish

Cut and attach circle shapes for the eyes

Cut long strips of tissue to form the tail pieces and attach inside the tail with glue

Finish by carefully punching two holes in the top of the fish (in the toilet roll inner) to attach a string to ‘fly’ your kite!


Displaying beachcomber finds

Displaying beachcomber finds

Finally I got round to doing something with the beachcombed finds we brought back from holiday in Druridge Bay late last summer. As we started our little hoard and Joss sat playing ‘shell shopkeeper’ on the beach I thought we should bring some home as souvenirs but it wasn’t until we got home and I photographed them that I realised how many we had!

Displaying beachcomber finds

I scoured Pinterest for ideas and settled on a simple glass jar for our bathroom window, TK Maxx came up trumps with this beauty for less than a tenner and I really love how it turned out after some careful curating. I saw lots of other ideas but felt they might detract from the natural beauty of the shells, displaying beachcomber finds is easy if you let the treasures do the talking!

Displaying beachcomber finds

Displaying beachcomber finds

That teeny tiny shell dangling from the top is smaller than my little fingernail and in perfect shape, Joss found it for me and I loved how perfect it stayed despite its tiny size, I may pinch it back and pop a jump ring on it to wear on a necklace from time to time!

Displaying beachcomber finds

So there we have it, happy memories captured to enjoy back home!

Love Bird Valentine

Valentine’s Day is something I’ve always liked, not in a cheesy way, I just have fond memories of my mam buying a special cake or treat for supper on Valentine’s Day and it’s a tradition I’ve always kept to, sometimes baking something for the loves in my life, sometimes just grabbing a treat from the shops after a busy day.
Joss and I have made a Valentine for Daddy this year, sadly she was too excited to keep it a secret but I’ve squirreled it away and I’m sure he’ll have forgotten in a month’s time!

If you’d like to make your own love bird it’s really easy.

Love Bird Valentine

I drew a rough bird shape on white card and cut it out for Joss to decorate.
Once she’d had free reign with the glue, glitter, foam stickers and strips I’d cut from leftover tissue paper wrapping we popped it to one side to dry. This took a long time, Joss LOVES PVA glue!

I took some twine and cut three lengths, one for the hanger which is taped in a loop with washi tape to the back of the bird, and two for the legs, adding a foam shape for feet and again attaching to the back of the decoration.

Finally I cut a rough envelope shape from stiff card to carry the love bird’s valentine message, ‘Daddy x’ and glued this to the bird’s body adding the finishing touch, a googly eye and ta-da, Happy Valentine’s Day Daddy!

valentine

Sensory play at Christmas – feat Hexbug

I think Christmas can be a brilliant time of year for sensory play. Earlier this week Joss and I spent an afternoon with a bowl of water, some ice-cubes and blue food colouring and had an amazing time playing with her plastic sea animals in the water and watching the ice cube ‘icebergs’ melt!

This year these are some of the gifts that Joss will be receiving, bath crayons, foam shapes to stick on the walls of the shower, and foam silly soap all intended to encourage more sensory play.

Image from Magic Toy Shop

Image from Magic Toy Shop

I’ve also bought a set of these sensory tubes for scientific explorations; I’ll be filling them with water, glitter and glue to make sparkly sensory tubes; Joss loves putting things in and out of containers so I know these will be a big hit.

eduzone

Now that she’s getting older I thought about other toys to support her learning. When HEXBUG contacted me about their range of robots for children I was really intrigued! By leveraging their robotics expertise HEXBUG toys launched a Micro Robotic Creatures product line designed to give children a positive experience with robotics at a young age – these are some of the coolest toys I have EVER seen! Look at this Battle Bridge, a brilliant arena for HEXBUG toys robots to interact in.

download

Our childminder has a selection of HEXBUG toys and Joss loved playing with them, so I was only too happy to add a HEXBUG toys review to this sensory play post. The Aquabot range starts at a super reasonable £7.99 for a single Aquabot; a robotic fish that really swims, these totally delight children, and why not, they move with such realistic actions that it’s hard to believe they’re robotic!

We reviewed the Aquabot 2.0; this interactive environment provides the fun experience of having a pet fish, without all the messy clean-up or need to remember to feed the fish, perfect for us and even better Joss can get her hands in and get wet too! The comes pre-set with batteries and spares, and with a small tank and stickers to decorate the environment for the fish! At £14.99 for the Aquabot 2.0 and bowl this makes a great all round gift.

aquabot

The Aquabot encourages kids to let their imaginations run wild as they care for their new pet. After five minutes without activity, the fish goes into sleep mode to conserve battery life, Joss found this utterly fascinating and even more fun as the fish can be awakened by tapping on the tank, and off it goes swimming again!

Other robots in the HEXBUG toys ranges react to light and sound or movement, these are brilliant little toys to introduce children to science and foster a love of engineering too; oh and they’re pretty fun for grown ups too!

Why not think about giving a fun sensory or scientific gift this Christmas?
Disclaimer: We were sent an Aquabot 2.0 for review purposes, all views are our own

Air drying clay at Christmas

I absolutely love air drying clay, it’s really easy to work with and has a really nice finish.

I bought a pack for £2 and started with a project I’ve wanted to do for a while, making a little trinket dish, something I’d seen on Pinterest. Decorated with a sharpie and sprayed with some varnish to finish it off I was really pleased with the results.

Air drying clay at Christmas

Air drying clay at Christmas

I made a few more to give as gifts, then used the leftover clay to make some Christmas tags/ornaments. These probably worked out at less than a quid to make and I’m really happy with the results.

Air drying clay at Christmas

I rolled out the clay to about 5mm thick and cut out the shapes using heart and circle cookie cutters, then I used various stamps including alphabet stamps to emboss designs into the clay (the bobbly designs were printed using a scrap of an old jumper so you don’t need stamps to get a nice result!) A straw was used to pop a circle in the tops so they can be hung on ribbons.

After two days they were dry and ready to sand gently, then paint. I checked on them every so often to check they were still nice and flat, air drying clay can curl so do take care to check on them!

I used metallic paints from Joss’ stash to decorate them, then finished them with a spray of varnish too.

airdrying clay christmas ornaments

Egg Carton Christmas Trees

egg carton christmas trees

Joss and I have been getting crafty most evenings for the last week. After dinner we clear the table and she asks to draw, once she tires of another round of drawing pigs and slugs (it’s always pigs and slugs she draws, I don’t know why!) she usually asks if we can do some painting.

I thought we’d use this time to start to make a few little Christmas decorations together. As I was clearing the kitchen last night I was about to pop the egg carton into the bin when I thought about using it for painting instead. Cutting out the centres of the carton I made some of them taller and some shorter and trimmed any rough edges before letting Joss go crazy on them with the glitter and paint!

Make your own Egg Carton Christmas Trees

If you’d like to make your own egg carton trees here’s the lowdown:

egg carton christmas tree

  • Cut out the pointed centres of your carton, remove any rough edges and prep them for your toddler by cutting them into different sizes.
  • Get decorating with paints, glitter glue and stickers
  • You can either keep them as they are or stack a shorter tree on a taller one as we have done to make them look more ‘tree like’
  • Then either keep as a snowy scene as we’ve done, or pop a little hole in the top with a pencil and add ribbon to make them into ornaments for your Christmas tree.
  • Enjoy!

A Simple Toddler Firework Activity!

simple toddler firework activity

It’s that time of year again, the time when Sarah and Duck’s firework dance is once again carefully choreographed by my tot and we all get the sparklers out!

We’ve had such fun at Joss’ toddler group this morning that I had to share her firework pictures; these are so simple and effective.

Take some black card, oodles of glitter glue and sparkles and let your little one go wild!

A Simple Toddler Firework Activity

You will need:

Black card

Glitter pens

Or glue and glitter

simple toddler fireworks

Let your tot go wild with the glue and glitter, there’s no exact science to fireworks so don’t intervene, just allow them to crack on and get messy!

WP_007133

Once they’ve made the firework designs write their name in glitter glue, then while it’s all still wet sandwich a piece of paper over the top of their picture and rub down hard to spread the glitter and the glue out and help it to hold.

Then peel off the top sheet to leave the sparkly design in place, allow to dry, then display!