I’m finding that it’s all very well and good having this free time to relax and get involved in some crafting but there’s really not much that I ‘need’ to make at the moment, we’re stocked up with birthday cards and the likes so I decided to turn my hand to making some birthday gifts.
This little framed mixed-medium picture was thrifty and fun to make.
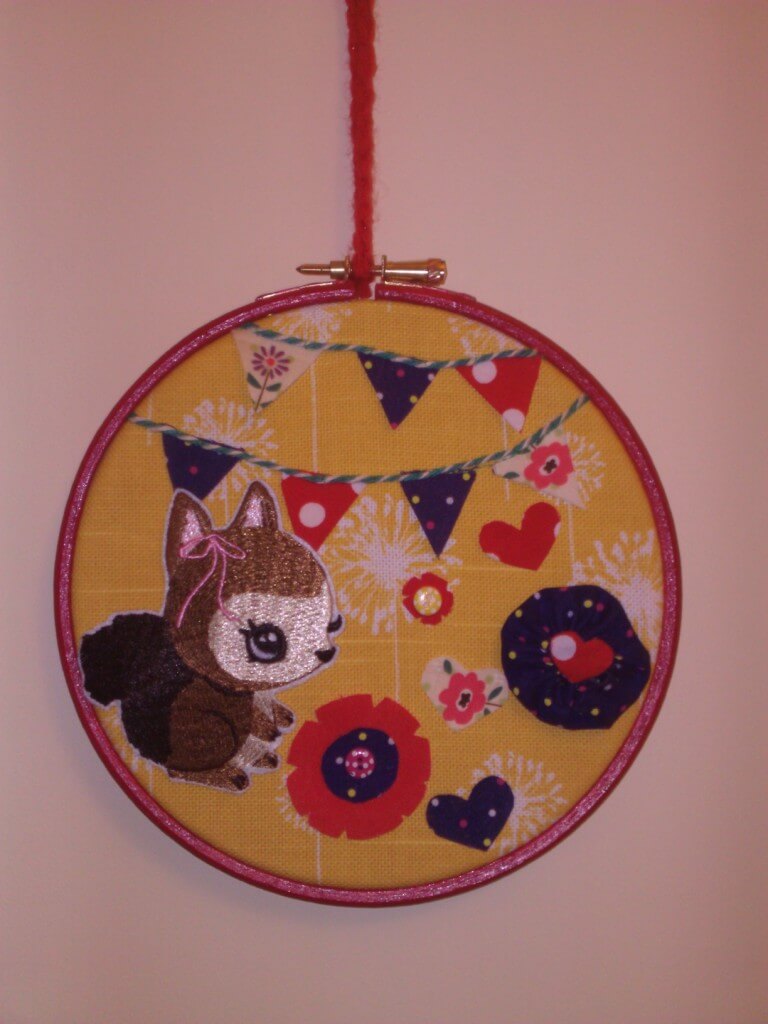
Perfect for a toddler or young child’s room I hope that its recipient will like it!
If you’d like to make one yourself I suggest checking out charity shops for a similar embroidery hoop, I think they make really sweet frames for these fabric pictures, painted or plain they look good with a ribbon to hang them!
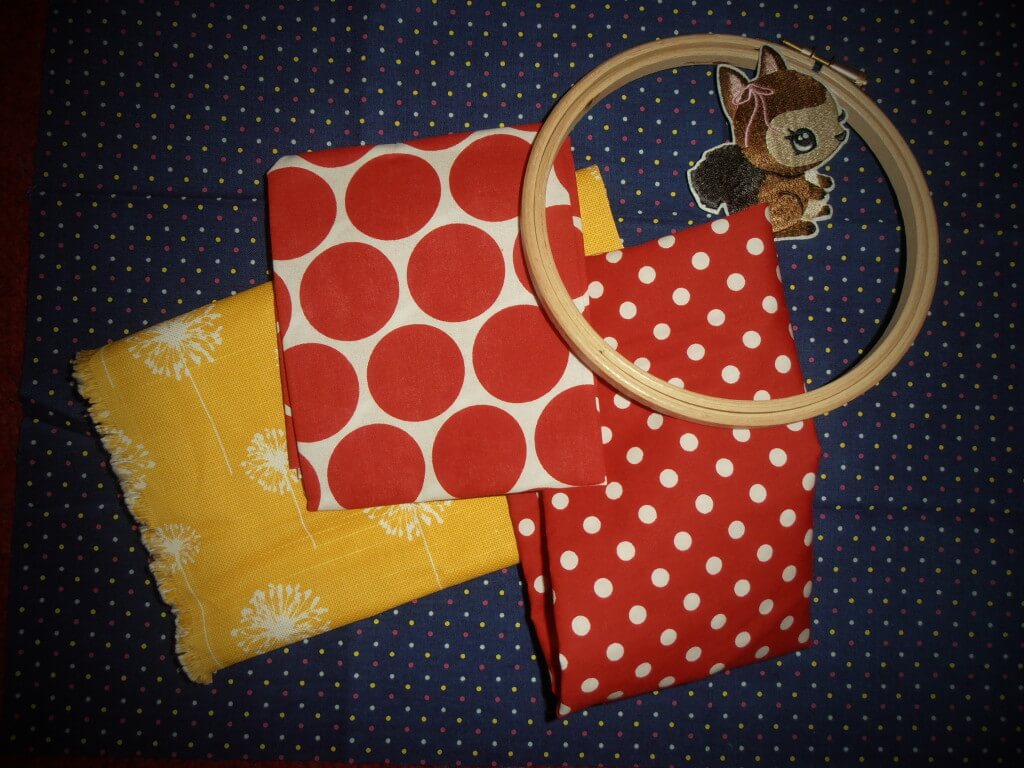
Materials
I started with an embroidery hoop (50p in a charity shop), some twine and little buttons and a selection of fabrics from my own stash, my sewing machine, but you can do much of it by hand, and some red project paint left over from this project. I had the little squirrel iron on patch from a set from H&M that I bought to decorate some plain t-shirts for Joss, so this one cost about 40p.
Base fabric
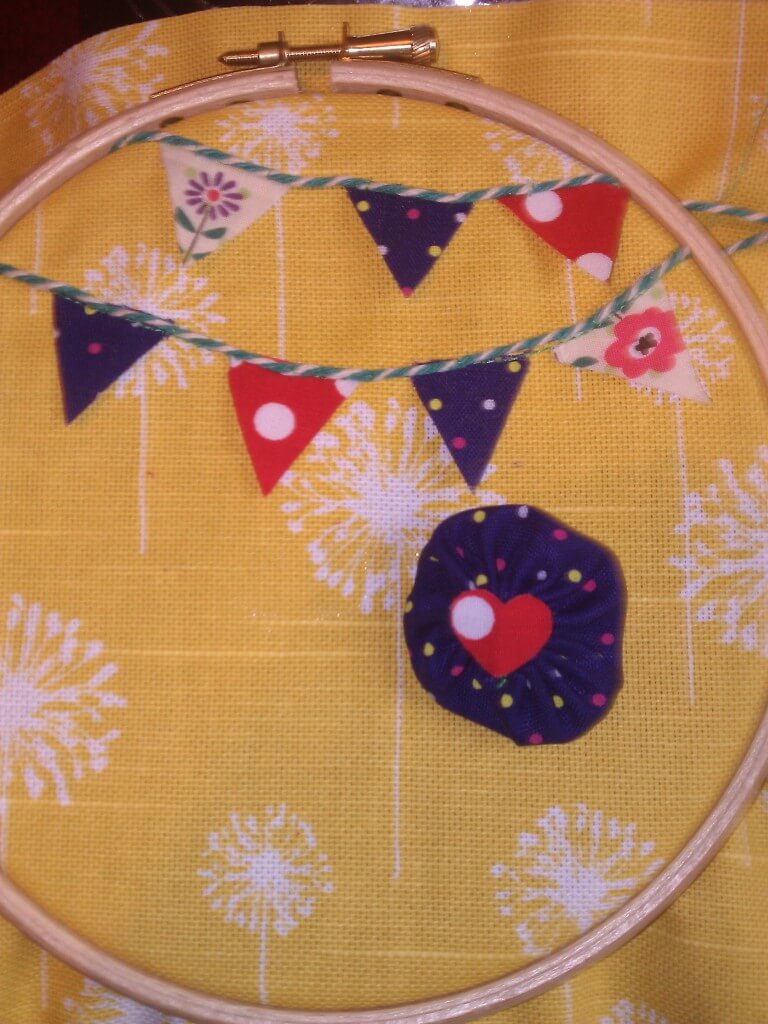
I selected this bright yellow flower print base fabric as it is pretty robust.
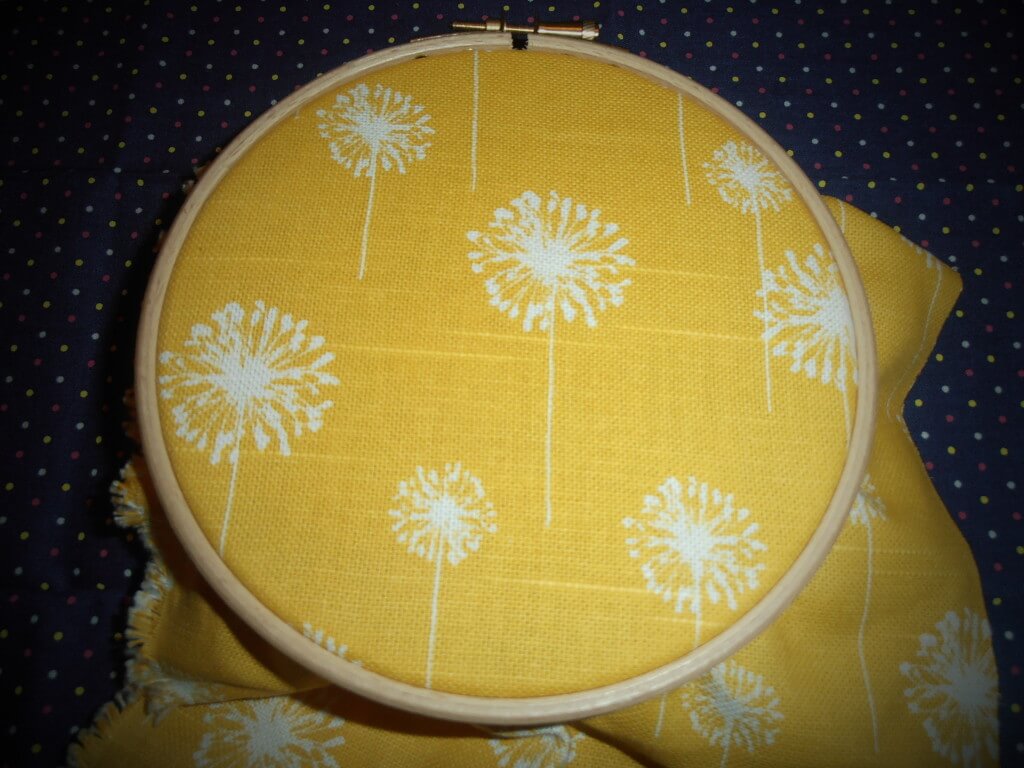
I drew around the outside of my hoop to give a guide for cutting the excess fabric, then drew around the centre piece to mark out the workspace I will be adding embellishment to.
Theme
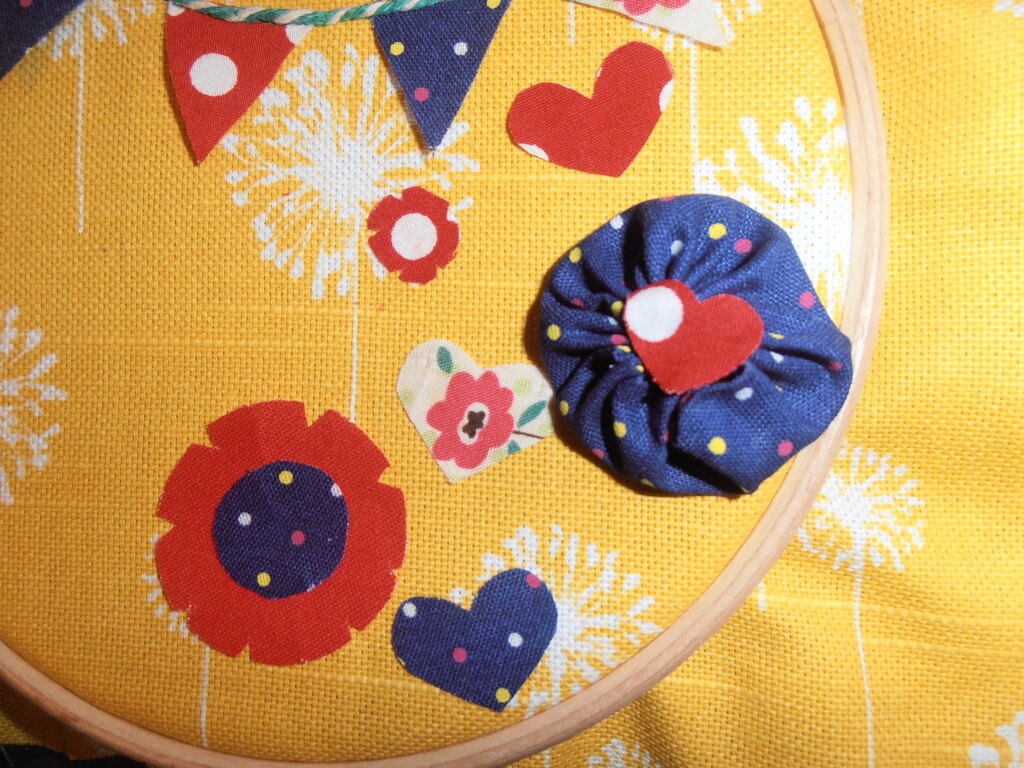
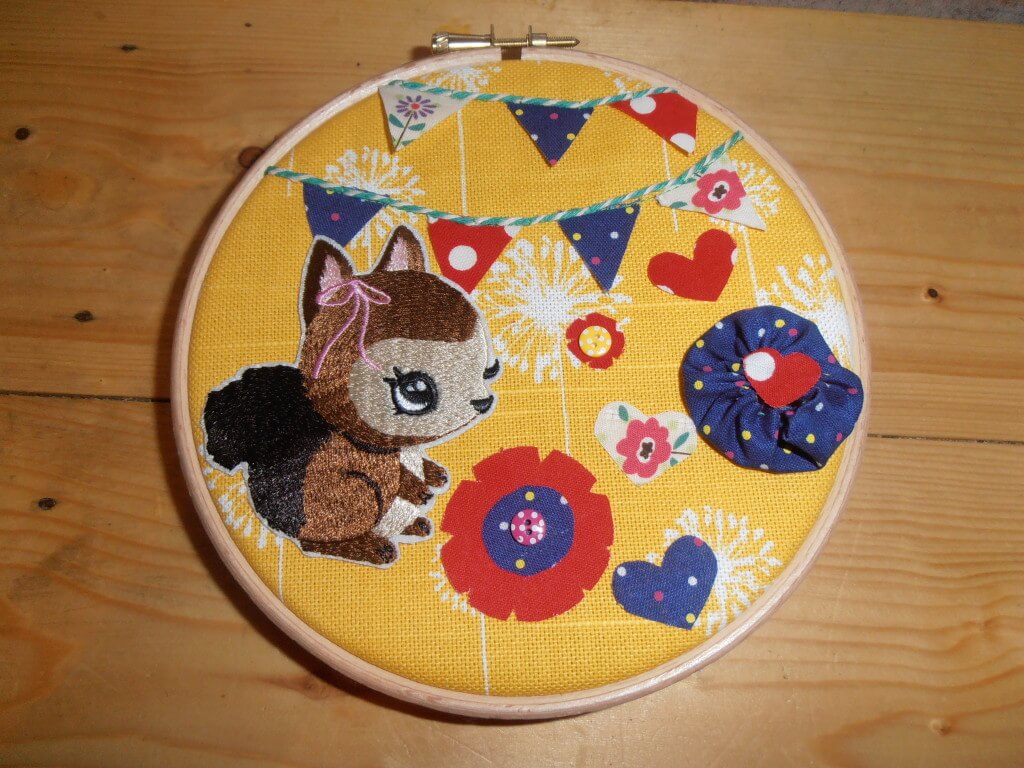
Then I laid out my various bits and bobs to go apply to it as I went along. I decided on bunting and flowers with the woodland squirrel as these are pretty safe toddler themes, and as I prefer brights for a little one’s room I went with blues and reds to complement the yellow.
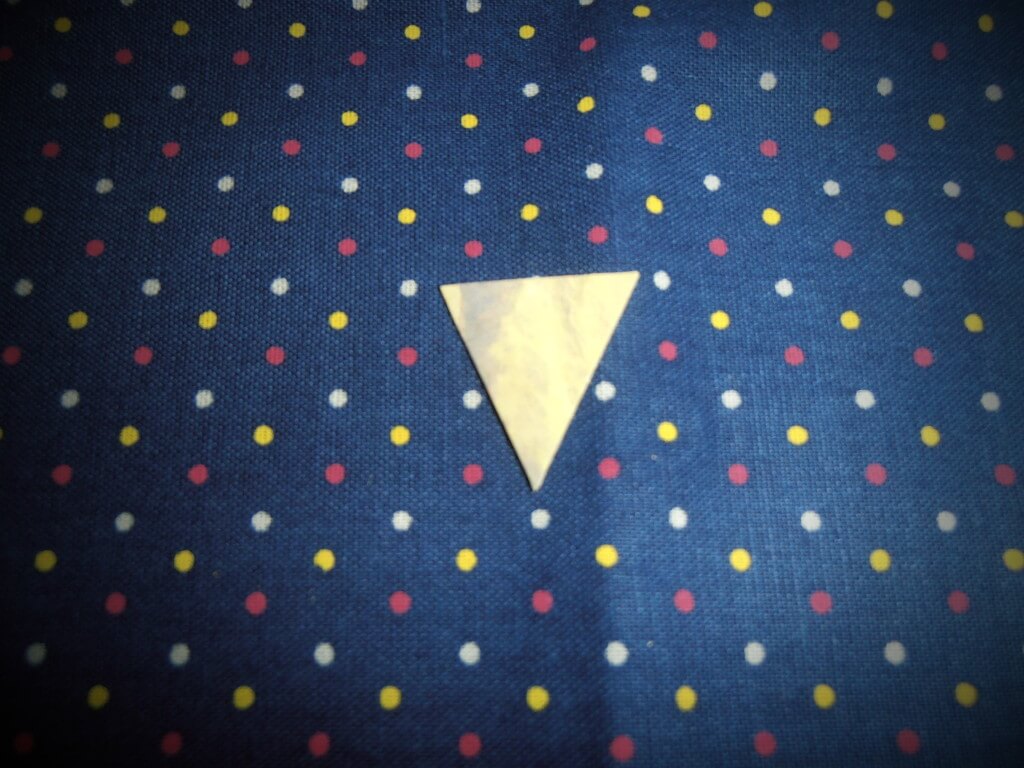
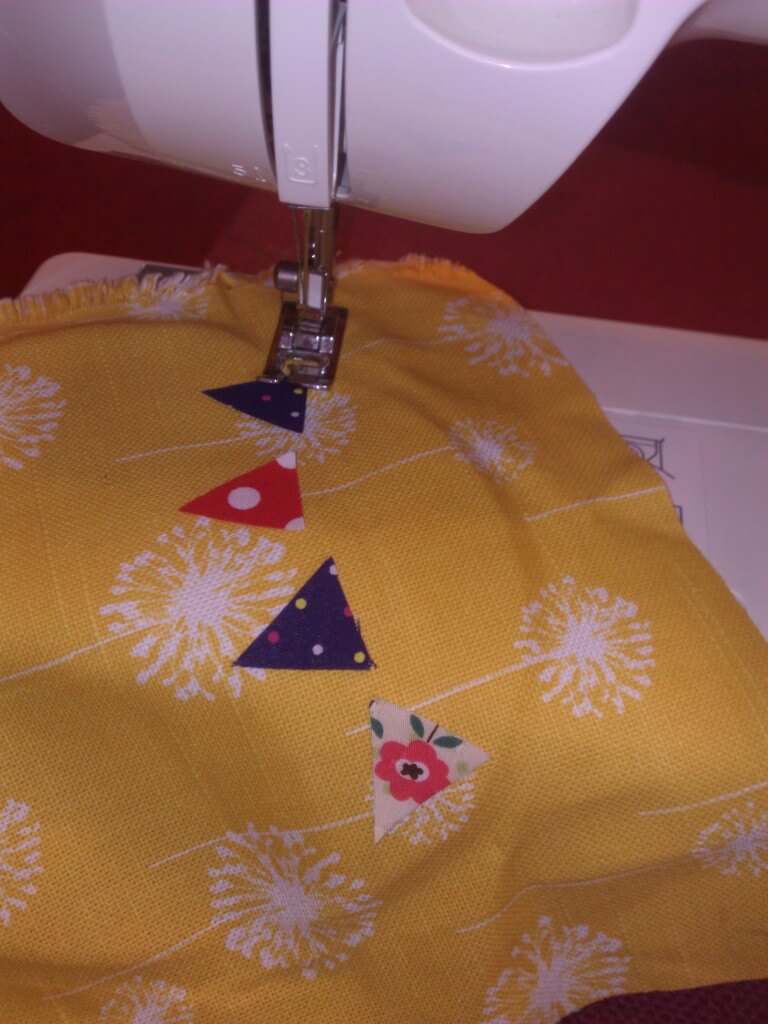
I cut a cardboard triangle to use as a template for my bunting flags, drew around it and cut out seven flags.
Getting started
I stitched the bunting flags in place
Then I cut two lengths of twine which I overlaid with a few stitches at inch intervals to hold in place
Embellishments
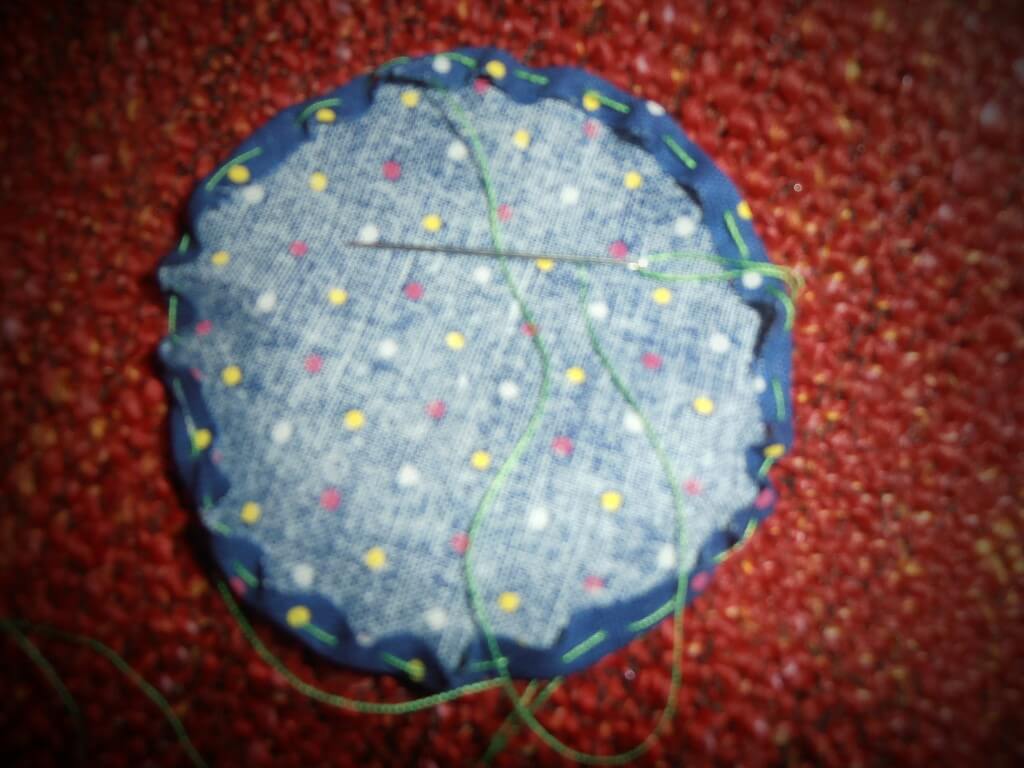
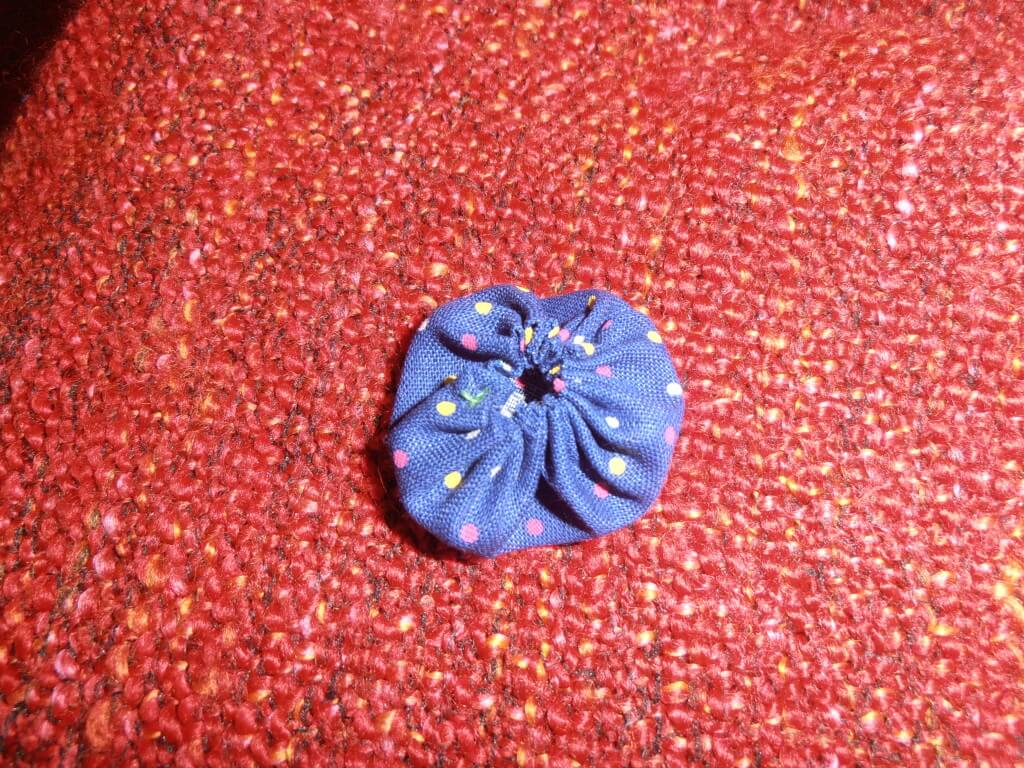
I made a fabric yo yo as a flower embellishment, I love yoyos, they’re very simple. There’s a great tutorial here, but basically you cut a circle of fabric and leaving a long tail of thread as you start fold and tack a quarter of an inch under on the wrong side of the fabric as you go with a needle and thread, once you reach where you started hold both ends of the thread and pull tightly to gather the fabric, then knot the ends of the thread and neaten with scissors leaving as it is or in my case adding a small red fabric heart to cover the hole where the yo yo fabric gathers in the middle.
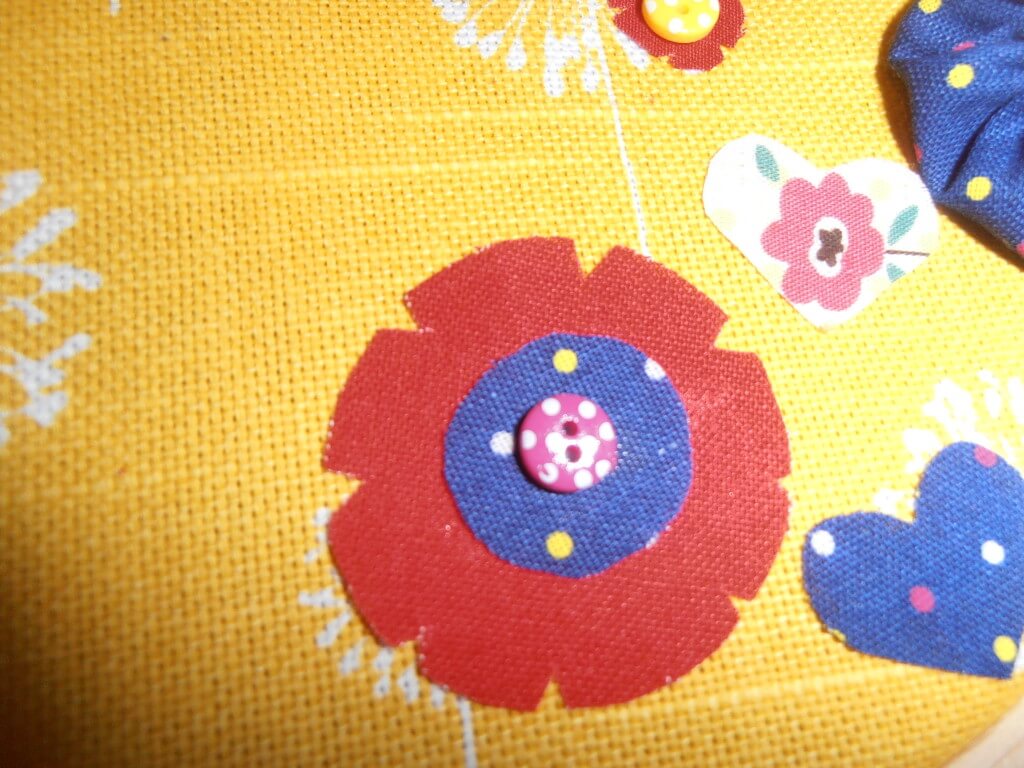
I cut fabric hearts and fabric flower shapes by cutting more circles and then cutting out notches to form petals, layering where I fancied and adding button centres to add interest, I decided to glue some in place and stitch others to add to the homespun effect.
Finishing touches
Finally I ironed my little squirrel motif in place.

Once I’d trimmed the yellow fabric back and tightened the frame using the screw fix I decided it needed a little lift
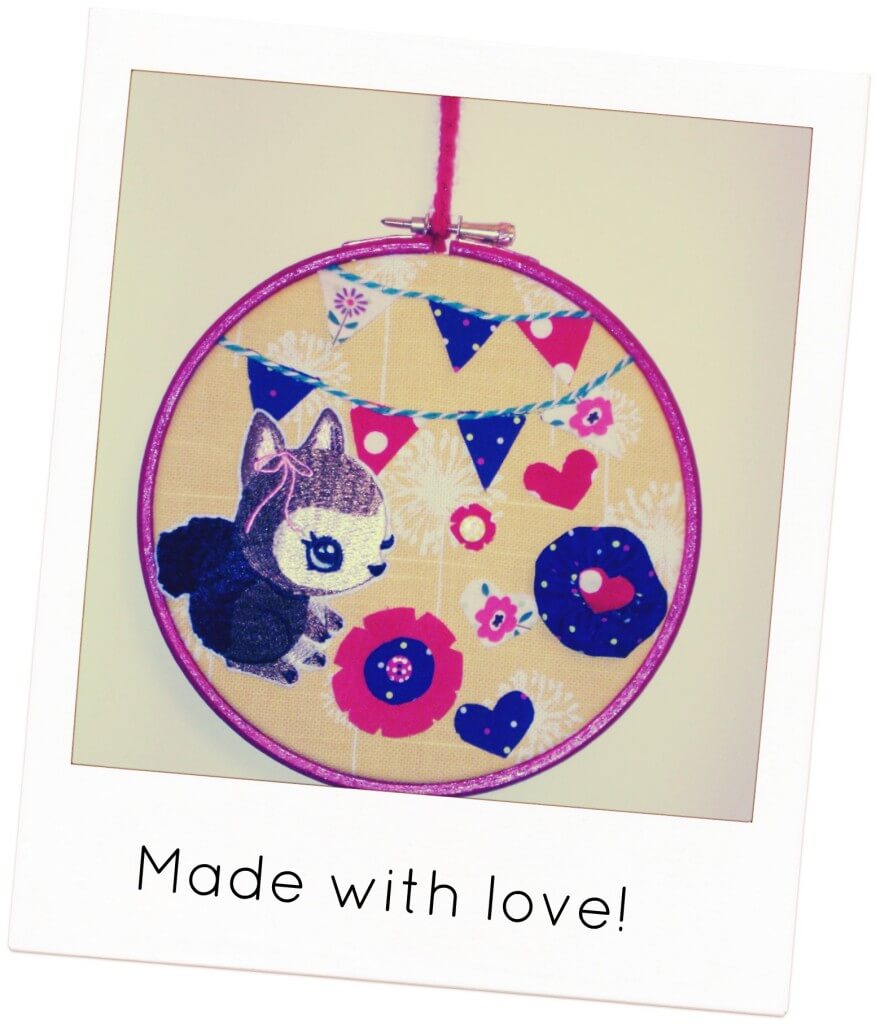
I painted the frame red and as I didn’t have ribbon I crocheted a strand of single crochet to add a loop to hang up the frame (I am a great believer in using what you have to hand)!
Tada!
![]()


